Using Canon ScanGear StarterCanon scanners include a utility called ScanGear Starter which allows the scanning of documents and images in a simple way. - Open ScanGear Starter.
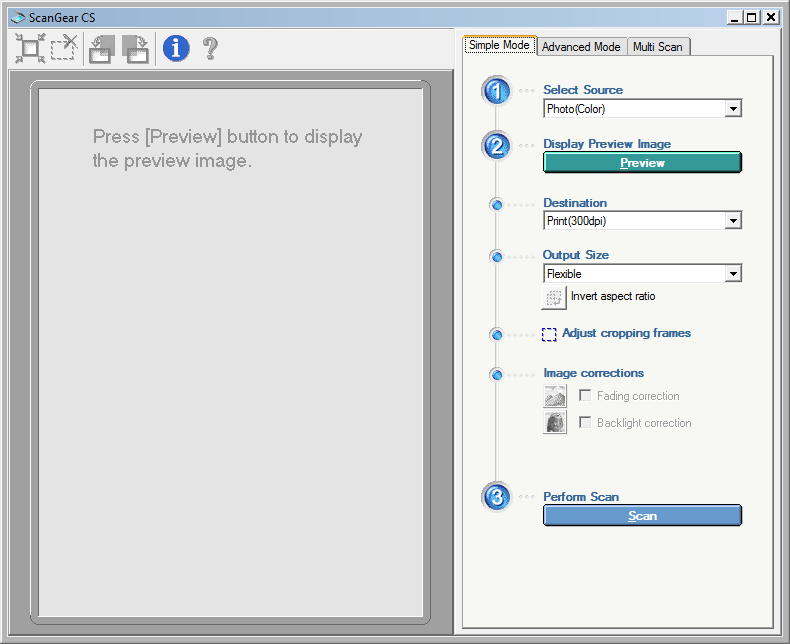 - Under the Simple Mode tab, choose the appropriate document type (eg. Colour, black and white, grayscale) next to Select Source.
- Choose an output resolution under Destination. For many documents, 150dpi may be appropriate, but for images 300dpi may be better.
- Click Preview.
The scanner will quickly scan the document (and perform a calibration if necessary) and present the entire image. - Use the dotted border to crop the image to the area required, by dragging the edges.
- When finished, click Scan. The image will be scanned and then stop.
- Close the ScanGear dialog by clicking the cross in the top right-hand corner.
You will then be prompted how and where to save the file. 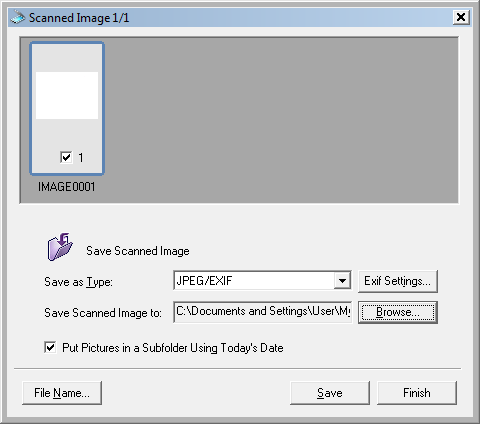 - If you are scanning a document, set Save as Type to PDF.
If scanning a graphic for a website, choose JPG/EXIF. If scanning a graphic for high-resolution and later manipulation, choose TIFF. - Choose the output location by clicking Browse next to Save Scanned Image To.
If you wish to specify a filename, click File Name and enter the name. - Click Save to save the file.
If the file is too big, or the quality is not good enough, re-scan with higher or lower resolution as required.
|